Introduction
Squid is a caching proxy server used to speed up websites by caching and delivering popular web pages and other content from the Internet. It is made to speed up online browsing by caching frequently visited pages and use less bandwidth. Squid is open-source software that works with many different operating systems, including Windows, Linux, and Unix.
A user's request for a web page is initially routed through the Squid server. Squid will transmit the requested page straight to the user if it is present in the cache rather than having to request it from the original web server. As a result, pages load more quickly and less bandwidth is consumed.
To install and configure Squid on Ubuntu, follow these steps:
1 - Install Squid by running the following command in the terminal:
sudo apt-get update
sudo apt-get install squid
2 - Once the installation is complete, navigate to the Squid configuration file by typing the following command in the terminal:
sudo nano /etc/squid/squid.conf
In the Squid configuration file, you can make changes to customize how the proxy server operates. For example, you can set the port number for Squid to listen on, specify which clients are allowed to connect to the proxy, and configure access control lists to restrict access to certain websites.
4 - Save your changes to the Squid configuration file and exit the editor.
5 - To start the Squid service, run the following command in the terminal:
sudo systemctl start squid
6 - You can check the status of the Squid service by running the following command:
sudo systemctl status squid
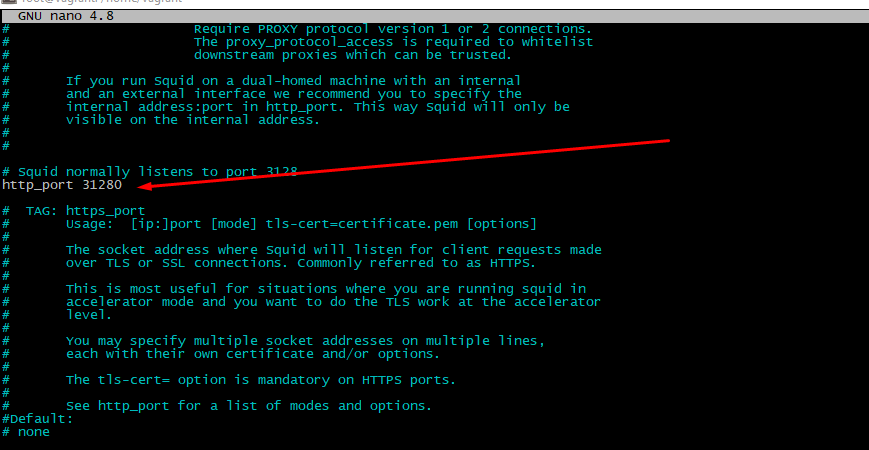
7 - Squid will "read" its service parameters from the file /etc/squid/squid.conf. So, edit it via nano, look for the parameter http_port option and change pre-defined value to the unused port number above 1024
8 - Then find http_access deny all" words. Further doings depend of expected result. To pass everyone access just set this to "allow all". More secure is accept data for some "trusted" IPs only. To include this option put directive acl whitelist src "/etc/squid/whitelist" before "http_access deny all"
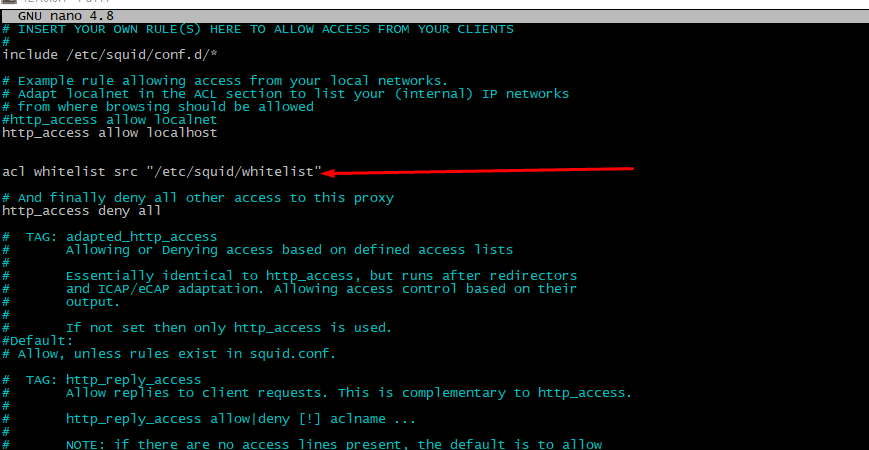
9 - Then put your IP-address to the /etc/squid/whitelist file and reload the service
curl ifconfig.me >> /etc/squid/whitelist
service squid restart
10 - Integrate user authorization
apt-get install apache2-utils -y
htpasswd -c /etc/squid/pswds <user>
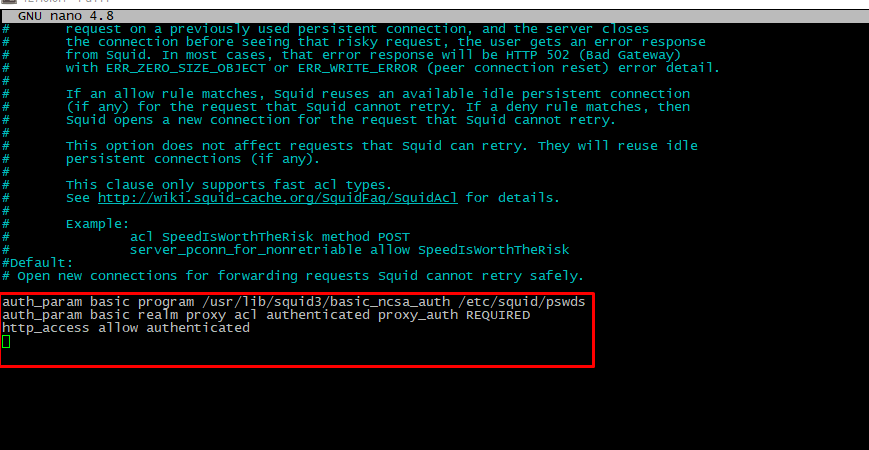
Next step is "integrate" this security mechanism with squid daemon. Edit config file again, uncomment (or create if it's not exist) these rows:
auth_param basic program /usr/lib/squid3/basic_ncsa_auth /etc/squid/pswds
auth_param basic realm proxy
acl authenticated proxy_auth REQUIRED
http_access allow authenticated
service squid restart
11 - Final testing
curl -v -x http://<username>:<password>@<IP-address>:<port> https://google.com
That's it! Squid should now be installed and configured on your Ubuntu system. You can test it by configuring your web browser to use the Squid proxy server and browsing the web.